
Protect List Management
Overview
On the list management page, users can effectively handle their block and allow lists. This includes adding, editing, and deleting lists and/or artifacts, along with the option to record notes. Artifacts eligible for inclusion in these lists encompass FQDNs, Domains, IPs, CIDRs, Nameservers, and Registrars.
Create a new block/allow list
Before creating a new list, select the appropriate tab from the top of the screen either Block List or Allow List.
Now, select one of the artifact types (FQDNs, Domains etc) you’d like to create a list for.
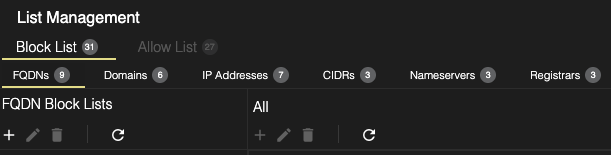
Next, to create a new list, click the plus icon on the left side of the screen below FQDN’s (pictured below).
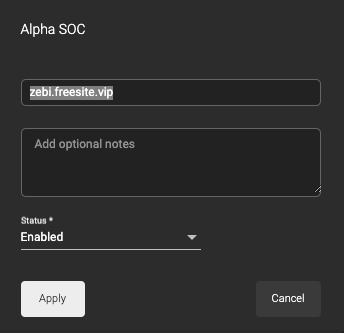
Now, you’ll be presented with this dialog box
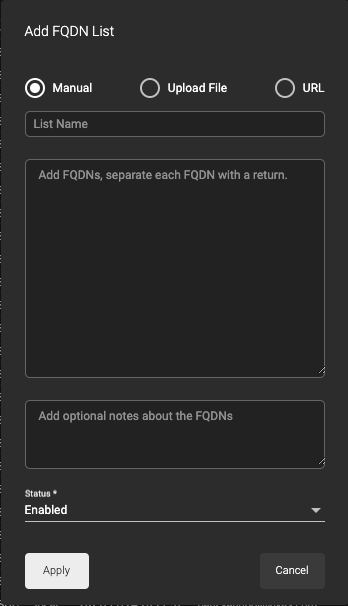
Start by selecting how you’ll be adding artifacts to your list
Manually Uploading Artifacts
With this method, you’ll manually type the FQDN(s), Domain(s), IP Addresses(s), CIDR(s), Nameserver(s) and/or Registrar(s) you’d like to include on your block/list.
Upload File
If you wish to upload file with the artifacts for your list, select the Upload File option and you’ll be prompted to locate and upload the file.
Although aren’t restricted to a specific file type of which to upload, generally CSV or JSON are the preferred formats. Once you upload the file and click “Apply”, you’ll be given the option to preview your import.
When uploading a file, make sure that it includes only one artifact per line. Lines beginning with # or lines that are blank will be ignored.
Review the Preview Import for accuracy including the amount of items that Will Be Added, Duplicates and Ignored.
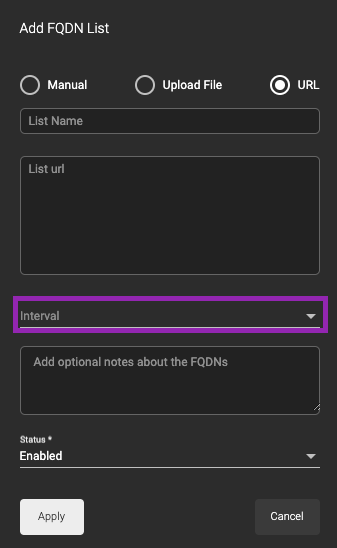
URL
HYAS Protect also allows you to input URL’s of threat intelligence or malicious domain lists.
By default, HYAS Protect will reach out and check your feed once daily. However, you may adjust that to Hourly, Weekly or Monthly based on your preferences by adjusting the “Interval” picker in the Add List dialog box.
Finish creating your list
Now that you’ve selected the type of list to upload, input a list name.
Include any pertinent notes about your list in the last box.
Check that the status of your list is “Enabled” and click Apply.
Edit an existing block/allow list
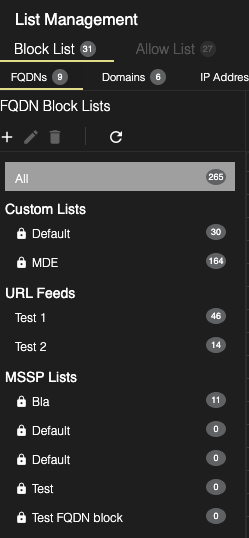
To edit a list, select (click) on the list you’d like to change.
Click on the pencil icon.
From here, you can rename, change the status (enabled or disabled) and add/change notes.
If you wish to add/remove artifacts from a list, please see below.
Edit and existing block/allow artifact
Edit a specific artifact by selecting that artifact and then clicking on the pencil icon.
Here you can edit the artifact itself, add notes or Enable/Disable an artifact from being blocked/allowed.
Adding an artifact to an existing block/allow list
If you wish to add an artifact to an existing list, simply select the list from the left side and then click on the + above the artifacts.

Delete a block/allow list or artifact
To delete a list or artifact, select it and then click the trashcan icon above the list (if deleting a list) or the trashcan above the artifacts (if deleting an artifact)
A pop up will appear confirming if you’d like to delete.
Press ok to proceed.
Searching Artifacts
To search for an artifact, first select the list you wish to search.
Now, enter the relevant information in the Search Data Table Field on the right of the screen.
