Protect Policy Management
Overview
HYAS Protect Policy Management allows organizations to define and enforce precise DNS security policies tailored to their unique needs. With this feature, administrators can create policies composed of Categories (such as malicious domains and content filtering) and specific Rules that dictate how DNS traffic should be handled.
These policies can be targeted to specific network assets, starting with Source Networks—IP ranges or CIDRs associated with locations, devices, or departments—and will soon expand to include user-based segmentation through the HYAS Protect Agent and integration with Local Active Directory. This evolution enables a shift from a global, one-size-fits-all model to a more granular and customizable approach, providing precise control over who can access what, and under which conditions.
Whether you're applying different controls across geographic regions, managing access for contractors versus full-time employees, or customizing protection levels for high-risk users, Policy Management makes it simple to create, apply, and manage traffic policies at scale—improving both security posture and operational flexibility.
Policy Components
Before you start building and applying policies in HYAS Protect, it’s important to understand the key components that make up each policy. These elements define how DNS traffic is evaluated and what actions are taken, giving you the flexibility to tailor protection to your organization’s needs.
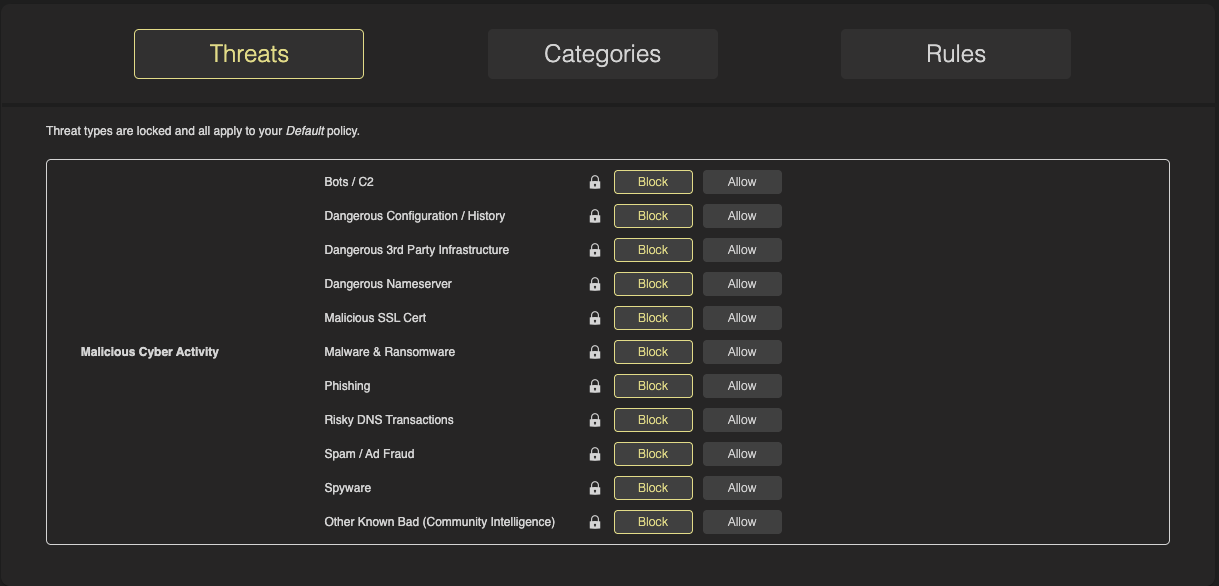
Threats
Threats are a core component of HYAS Protect’s policy framework—and for good reason. These include high-risk categories such as Bots/C2, Phishing, and Spyware, which represent serious threats to your organization’s security and data integrity.
Because of their critical nature, threat categories are always blocked by default and are non-configurable. This ensures that your environment is protected against known malicious activity the moment HYAS Protect is deployed—with no additional setup or tuning required. It’s protection you can count on, right out of the box.
Categories
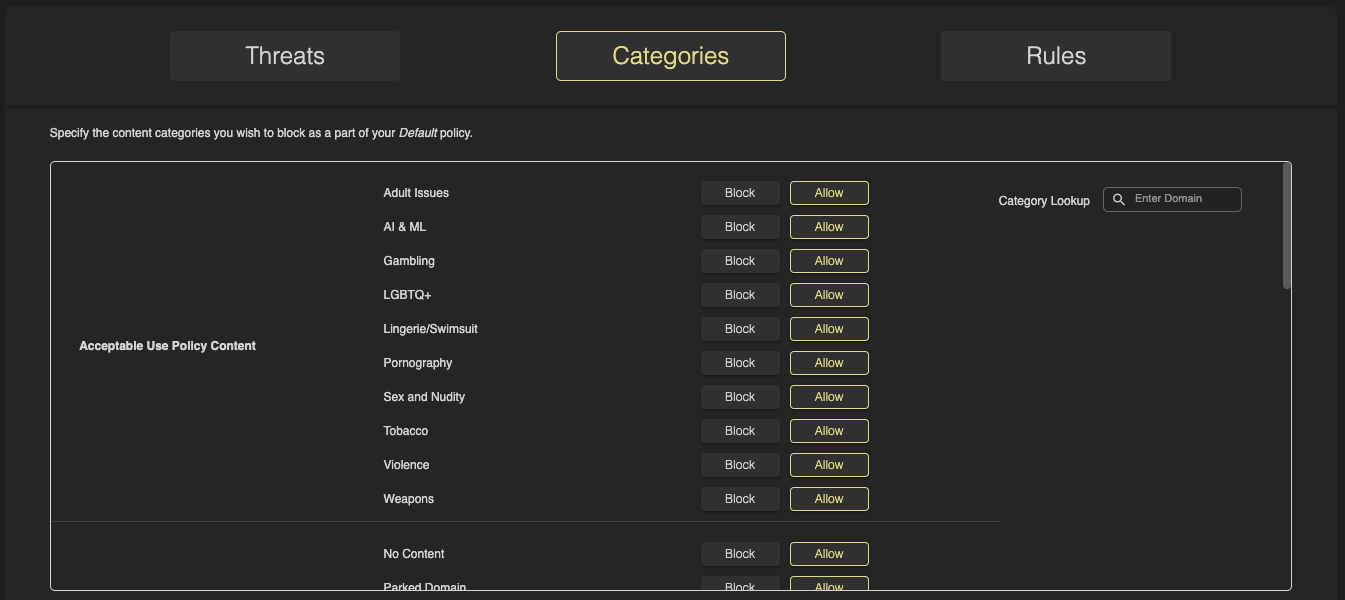
Categories in HYAS Protect provide powerful content filtering capabilities, enabling organizations to control access to websites based on type or purpose. Whether it's social media, streaming sites, adult content, or potentially risky web services, Categories allow you to enforce browsing policies that align with your organization’s security posture and acceptable use standards.
HYAS Protect uses highly accurate and continuously updated web categorization, making it easy to apply the right filters. Categories are grouped into six intuitive sections, simplifying configuration and helping you quickly tailor access controls to different user groups, departments, or locations—ensuring users only access appropriate and approved content.
The six sections are:
Acceptable Use Policy Content
Anomalous Web Resources
Dangerous Web Activity
Digital Information Transfer
No Category
Workplace Distraction
Some Parent Categories contain one or more Child Categories, which offer more granular control over content filtering. For a full breakdown of these relationships, refer to the Domain Categorization Breakdown
Rules
Rules offer an additional layer of customization within HYAS Protect policies. While Categories provide broad content filtering, Rules allow you to define precise actions—such as Block, Allow, or Redirect—based on specific DNS artifacts.
These artifacts can include fully qualified domain names (FQDNs), top-level domains (TLDs), keyword matches, and more, giving you granular control over what traffic is permitted or denied. Rules are especially useful for making exceptions to broader policies or targeting very specific behaviors.
Use Rules to fine-tune your security posture and create tailored experiences for different users or use cases—all within a centralized, policy-driven framework.
Redirect function only available when selecting a Domain or FQDN as a ‘Type’.
Default Policy
When a new organization is created in HYAS Protect, a Default Policy is automatically provisioned to ensure immediate baseline protection. This Default Policy acts as a catch-all, applying to any network assets not explicitly assigned to another policy—often referred to as “orphaned” assets.
The Default Policy cannot be deleted, disabled, or reordered, and it is always evaluated last in the policy chain. Organization administrators can edit the Default Policy, provided the organization's MSSP has not enabled policy inheritance, which would lock the policy from local changes.
As a best practice, step one should be to configure your Default Policy to establish foundational protections for all unassigned assets. Once that's in place, you can create more granular, custom policies targeted to specific network assets. This layered approach ensures you're secure out of the box, while still allowing precise control as your policy strategy matures.
Note: If no other policies are assigned, the Default Policy will automatically apply.
Policy Evaluation
In HYAS Protect Policy Management, you can create multiple custom policies in addition to your Default Policy. When multiple policies exist, there must be a clear order in which they are evaluated—this is where Policy Evaluation comes into play.
Policies are evaluated in a top-down order, meaning those listed higher in the sequence have higher priority and take precedence over those below. This evaluation order is especially important when using Local Active Directory integration or Custom HYAS User Groups, as users may belong to multiple groups simultaneously.
In such cases, only the highest-priority applicable policy is enforced, and no further policies are evaluated for that asset. This ensures that policy behavior is both predictable and intentional, allowing for precise control over access and protection across overlapping user or network groups.
Creating Policies
Now that you have a clear understanding of what policies are, what components they include, and how they’re evaluated, it’s time to walk through the process of creating a custom policy in HYAS Protect.
This step-by-step guide will help you define your policy settings, choose your target assets, and configure the appropriate Categories and Rules to align with your organization’s security and access requirements.
Start by clicking on the Protect Policy Management icon on the left-side menu:

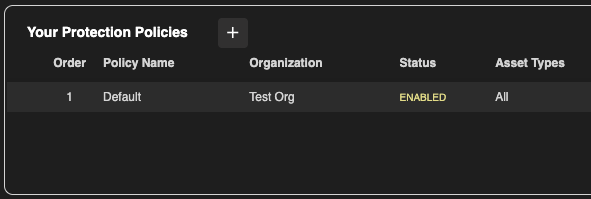
Next, click on the Create button next to Your Protection Policies
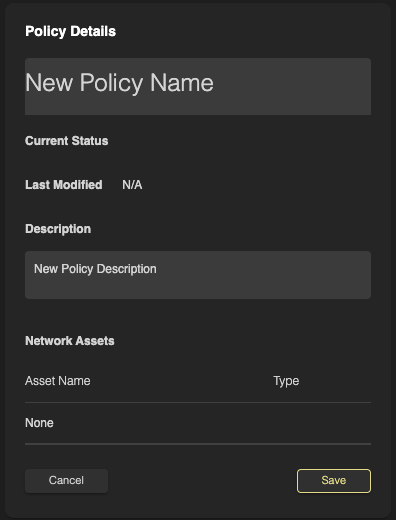
In the Policy Detail section, enter a name for your policy and provide a brief description to help identify its purpose. Once you've filled out both fields, click Save to continue.
Blocking Categories
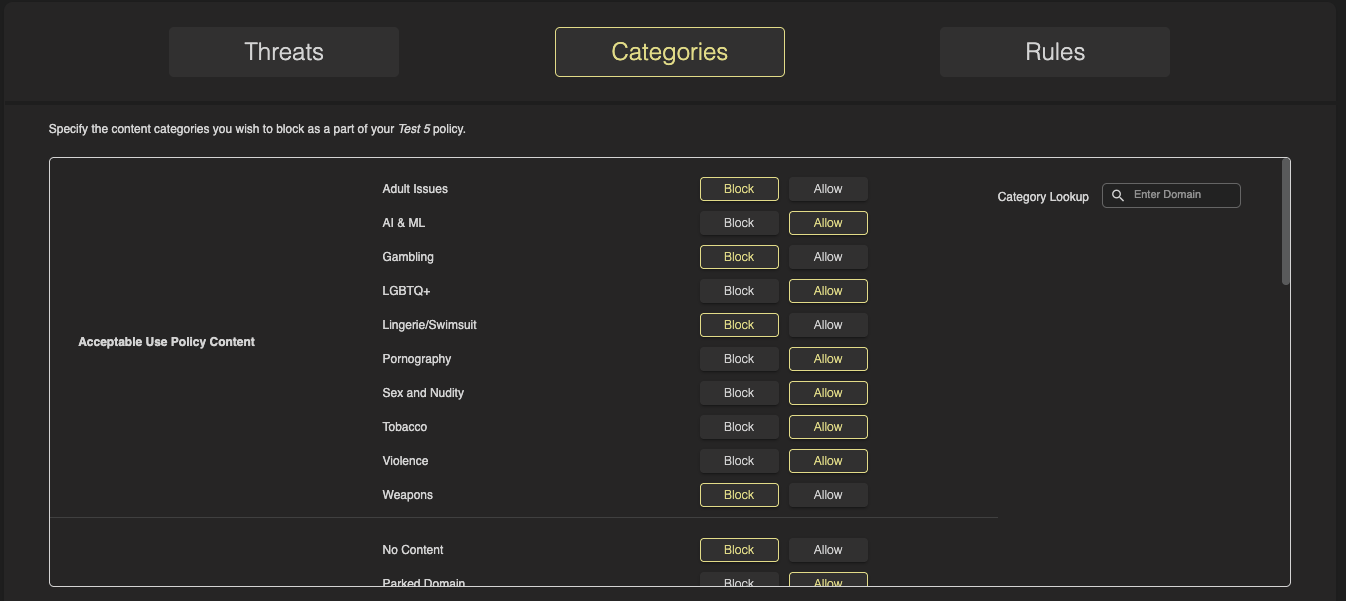
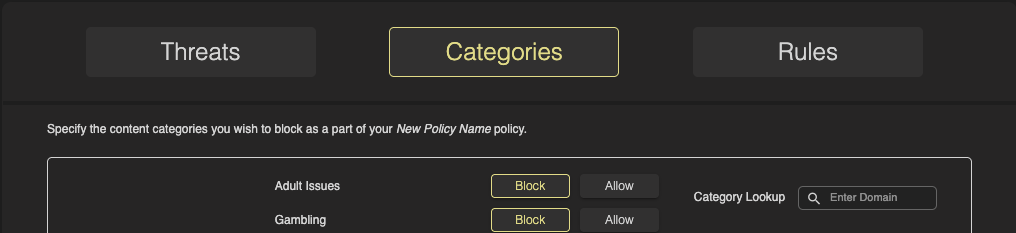
Now that you’ve created a policy, the next step is to configure its Categories and Rules to define how it will handle DNS traffic. As previously noted, Threats are always blocked and cannot be modified, so the first configurable area is Categories. Navigate to the Categories section to begin setting content filtering preferences.
Select from the available categories the ones you would like blocked in this policy. You may select as few or as many as you’d like.
Some categories may appear ‘missing’ from the Policy Management page. HYAS Protect prioritizes the categories most relevant to client interests for blocking, thus excluding certain ‘low-level’ categories from the configuration. However, you will still see those categories in Log View, Aggregate Log View etc.
Once you’ve configured your Categories, you can move on to configuring Rules.
You are not required to configure both Categories and Rules for a policy. Each policy supports either one or both, allowing you to apply the combination that best fits your specific use case.
Creating Rules
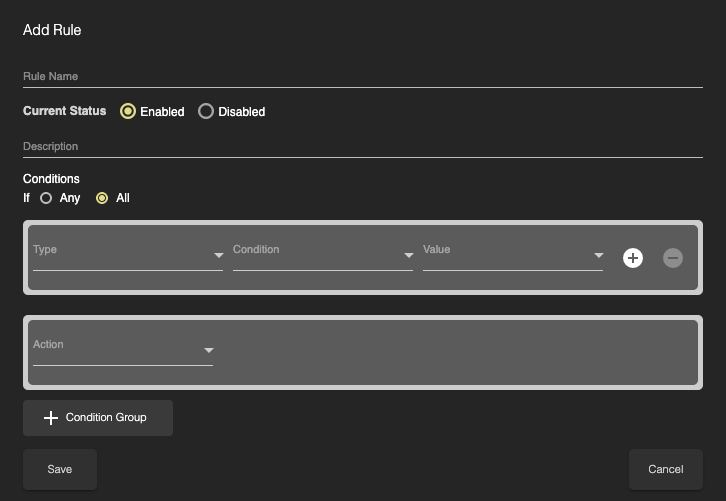
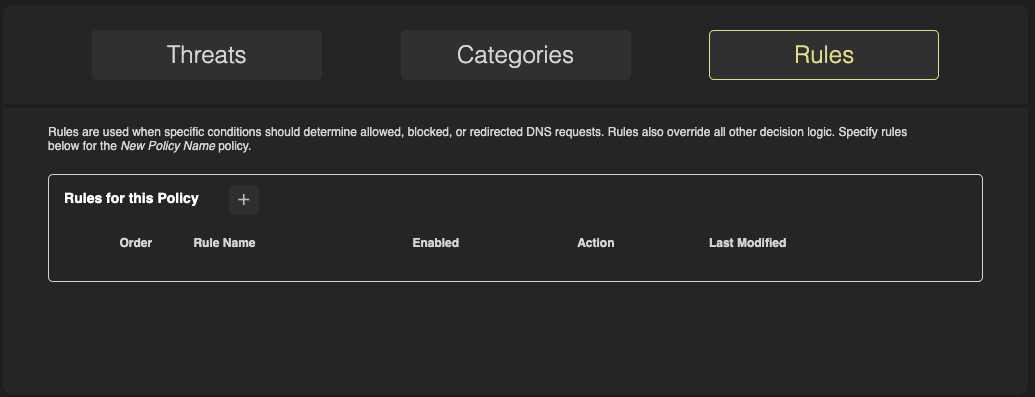
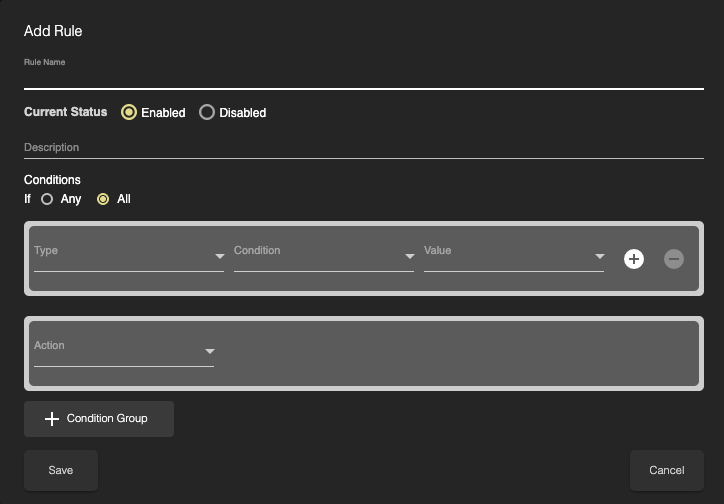
Navigate to the Rules section and click on the + next to Rules for this Policy to create a new rule.
Now, configure your rule. Rules can be created based on the following artifacts:
Type | Condition | Value |
|---|---|---|
Category | Matches/Does Not Match | Pre-defined picklist |
Client IP | Matches/Does Not Match | User-provided input |
CName | Matches/Does Not Match | User-provided input |
CName FQDN | Matches/Does Not Match | User-provided input |
CName TLD | Matches/Does Not Match | User-provided input |
CVE | Is/Is Not | User-provided input |
Device Name | Matches/Does Not Match | User-provided input (can use wildcards) |
DoH | Is True | N/A |
Domain | Matches/Does Not Match | User-provided input |
Domain Age | Less Than, Less Than or Equal To, Greater Than, Greater Than or Equal To, Equals, Not Equals, In Unknown | User-provided input |
Domain Category | Matches/Does Not Match | Pre-defined picklist |
Domain TLD | Is/Is Not | User-provided input |
DoT | Is True | N/A |
FQDN | Matches/Does Not Match | User-provided input |
IP | Matches/Does Not Match | User-provided input |
IP Country | Matches/Does Not Match | Pre-defined picklist |
Nameserver | Is/Is Not | User-provided input |
Nameserver FQDN | Matches/Does Not Match | User-provided input |
Nameserver IP | Matches/Does Not Match | User-provided input |
Nameserver IP Country | Matches/Does Not Match | Pre-defined picklist |
Nameserver TLD | Is/Is Not | User-provided input |
Open Port | Matches/Does Not Match | User-provided input |
Proxy IP | Is True | N/A |
Query Type | Is/Is Not | User-provided input |
Registrar | Matches/Does Not Match | Pre-defined picklist |
Status | Is/Is Not | Pre-defined picklist |
Username | Matches/Does Not Match | User-provided input (can use wildcards) |
Once you’ve created your rule, click Save and you’re all set!
Assigning a Policy to a Network Asset
Now that you’ve successfully created a policy, the final step is to assign it to a Network Asset for it to take effect and begin enforcing your configured settings.
As of the time of this writing, Source Networks are the only available option for policy assignment. However, additional assignment methods—such as user-based targeting via HYAS Protect Agents and Local Active Directory—are coming soon, so stay tuned for future updates.
Navigate to the Source Networks section from the left side menu

Next to the Source Network you’d like to apply the policy to, select the dropdown menu and click on the desired policy from the list.
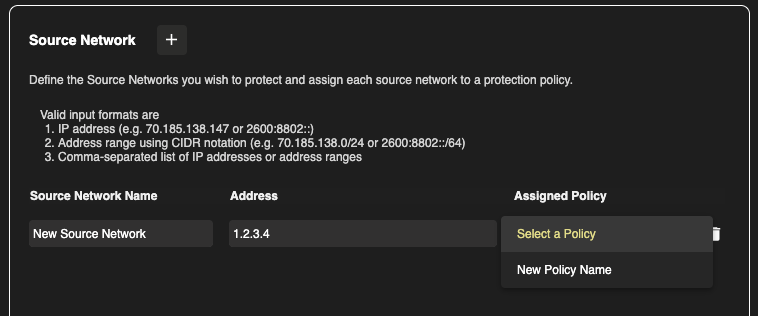
Finally, click on Save and your policy is now applied!
Only 1 policy can be applied per source network.
Searching a Domain’s Category
Rather than parsing endless amounts of logs looking to see how HYAS categorizes a domain, HYAS Protect provides a domain Category Lookup tool. While still in the Categories section of the Policy Management, Simply navigate to the upper right corner of the screen to find Domain Category Lookup. Enter your domain here and hit enter and you’ll be presented with a new box that display’s the domain’s category.
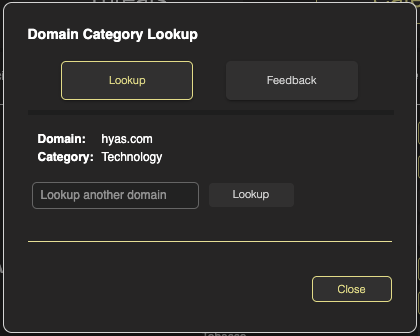
Here, we can see that hyas.com is categorized as Technology. You may also input another domain from this box to lookup.
Providing Feedback On a Domain’s Category
From time to time, you may find you don’t agree with a domain’s categorization. It’s easy to provide HYAS feedback on these such instances. While still in the Domain Category Lookup tool, click on “Feedback”
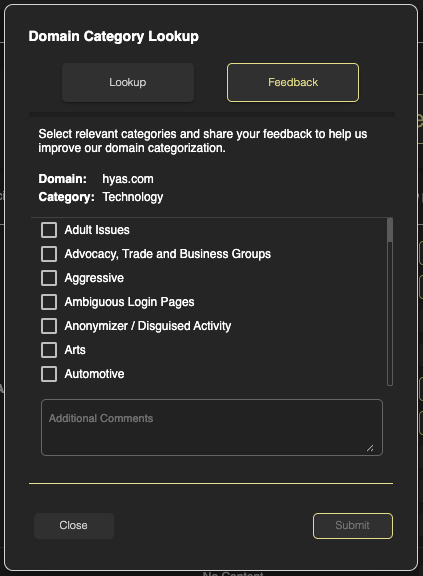
Now, you’re presented with a list of categorizes to choose from that you may feel fits the domain better. Choose the new category and provide us some additional context in the comment box below. Hit Submit and we’ll get a notification of your request. Upon reviewing the suggestion further, HYAS will can update the domain category accordingly.