
Single Sign-On (SAML)
Overview
HYAS optimizes user authentication through Single Sign-On (SSO), a sophisticated method that enables seamless access to various systems with a single set of credentials. This process is complemented by the utilization of the Security Assertion Markup Language (SAML), an XML-based standard designed for secure authentication and authorization data exchange between an identity provider (IdP) and a service provider (SP), with HYAS functioning as the SP.
The workflow involves organizational administrators configuring the IdP, which may be a system like Active Directory or an SSO provider, to utilize SAML. Concurrently, HYAS is configured as the SP. When a user initiates a login attempt to HYAS, the request is redirected to the designated identity provider.
Upon reaching the identity provider, the user undergoes authentication, and upon successful validation, the IdP generates a SAML assertion. This assertion encapsulates crucial information about the user's identity and permissions. Subsequently, the SAML assertion is transmitted back to HYAS.
In its role as the service provider, HYAS meticulously validates the received SAML assertion. If the assertion proves valid, HYAS grants access to the user, eliminating the necessity for additional credentials. Fundamentally, SAML facilitates a secure and standardized process, instilling trust in HYAS to recognize and validate the authentication performed by the organization's identity provider. This integration streamlines the user login experience, providing a seamless access mechanism while mitigating the need for managing disparate credentials across multiple systems.
Implementing SSO for HYAS
Note that once you’ve set up SSO, you’ll need to create users through your ipA and not through the HYAS Protect UI.
Microsoft Entra
First, navigate to the Settings Icon at the top right of the page. Then click on Single Sign-On (SAML)

Now, you’ll be on the SSO configuration page:

Start by enabling SSO in HYAS by toggling the feature to ‘Enabled’ as shown in the screenshot above.
Next, navigate to your Microsoft Entra account.
Follow the steps noted in Microsoft’s, Enable single sign-on for an enterprise application documentation.
Please see below for mapping assignments when configuring the ‘Basic SAML Configuration’ section
When configuring SSO in Entra, step 1 of the ‘Set up Single Sign-On with SAML’ section will ask for ‘Basic SAML Configuration’ information so that HYAS and Microsoft may communicate. The three fields you’ll need to fill out in Entra are:
Identifier (Entity ID)
Reply URL (Assertion Consumer Service URL)
Sign on URL
Microsoft and HYAS use different nomenclature for these items so its imperative to view the chart below so that you may input the information in the proper locations.
Microsoft’s Nomenclature | HYAS’s Nomenclature |
|---|---|
Identifier (Entity ID) | Audience URL |
Reply URL (Assertion Consumer Service URL) | SSO URL |
Sign On URL | N/A (see below) |
Copy the Audience URL in HYAS Protect and paste it in the Identifier (Entity ID) cell in Entra.
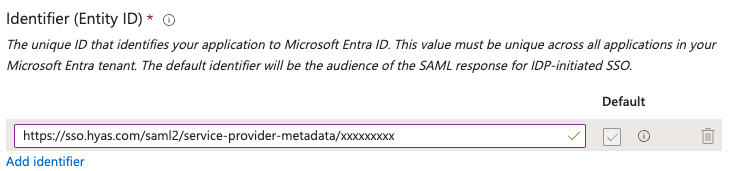
Please note that the concluding characters of the Identifier (Entity ID) referenced above have been replaced with 'x's. The identifier you retrieve from HYAS Protect will be unique to your organization.
Copy the SSO URL from HYAS Protect and paste it in the Reply URL (Assertion Consumer Service URL) in Entra.
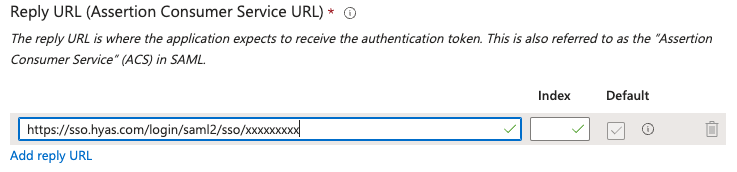
Please note that the concluding characters of the Reply URL (Assertion Consumer Service URL) referenced above have been replaced with 'x's. The identifier you retrieve from HYAS Protect will be unique to your organization.
Finally, enter the following in the Sign on URL section:
https://sso.hyas.com/saml2/authenticate/ + your organizations unique identifier.
The unique identifier for your organization can be located at the end of your Audience URL or SSO URL in HYAS Protect. It will consist of the last 9 characters at the end of the URL, preceded by the final '/'.
Example (do not copy this link) https://sso.hyas.com/saml2/authenticate/1a2b3c4d5

Once you’ve entered and saved the values above, you’ll need to complete the process on the HYAS side by uploading the App Federation Metadata Url and the Federation Metadata XML.
Under the SAML Certificates section, copy the App Federation Metadata Url from Entra


Paste the App Federation Metadata Url here in HYAS Protect:

Then, navigate back to Entra to download the Federation Metadata XML file.

Once downloaded, upload the file to HYAS Protect under the IdP Metadata File section:
Finally, click on ‘Validate IdP metadata’
If the validation is successful, you’ll receive a green notification at the top of the screen. If not, you’ll receive a red notification.
Role Mappings
The final step in configuring SSO is assigning specific users to specific HYAS Protect roles. This can be accomplished in the Role Mappings section.
Start by toggling on the role and selecting a permission set.
Roles will vary depending on your licensing configuration.
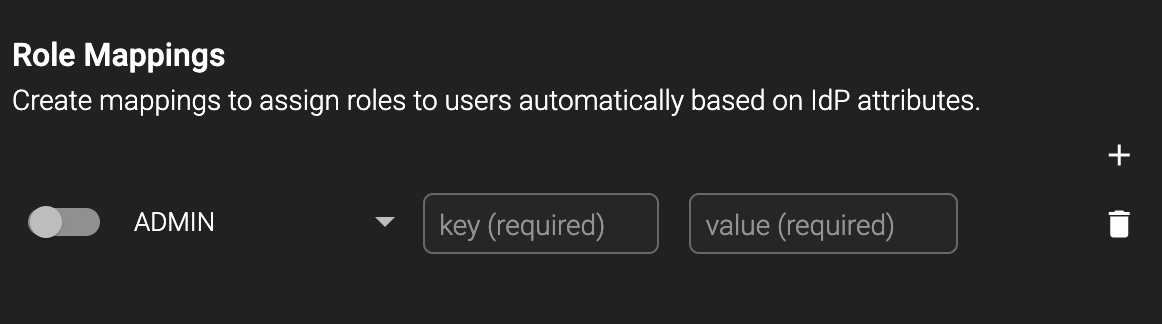
Finally, enter the user’s key (eg: ‘email’) and value (eg: users email) associated with their IdP attribution.
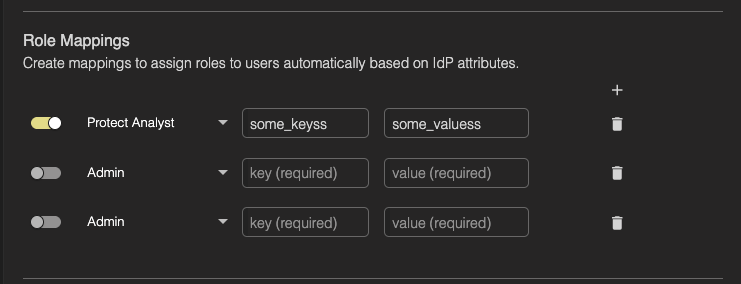
Add as many additional roles as needed by hitting the + icon.
AWS
Please contact us at support.hyas.com if you’d like more information configuring SSO via AWS.
Please contact us at support.hyas.com if you’d like more information configuring SSO via Google.